

The Shell Is Weather-Tight. Now What?
When a DreamStart Homestead Shell is complete, you have a dried-in, fully insulated building envelope: SIP walls, trussed roof with R-40+ blown-in attic insulation, metal exterior cladding, windows and doors set, concrete slab underfoot. The shell is weather-tight. Nothing inside it will get wet. You can take your time.
What you don't have yet is a finished home. You have a shell with electrical chases pre-cut in the SIP panels, open interior volume with no partition walls, no mechanical systems, no plumbing, and a beautiful concrete slab. The interior work (turning this shell into a livable home) is the second phase of the build. And it's the phase where an owner-builder can make the biggest dent in the total cost.
The Interior Work That's Genuinely DIY-able
Interior Framing
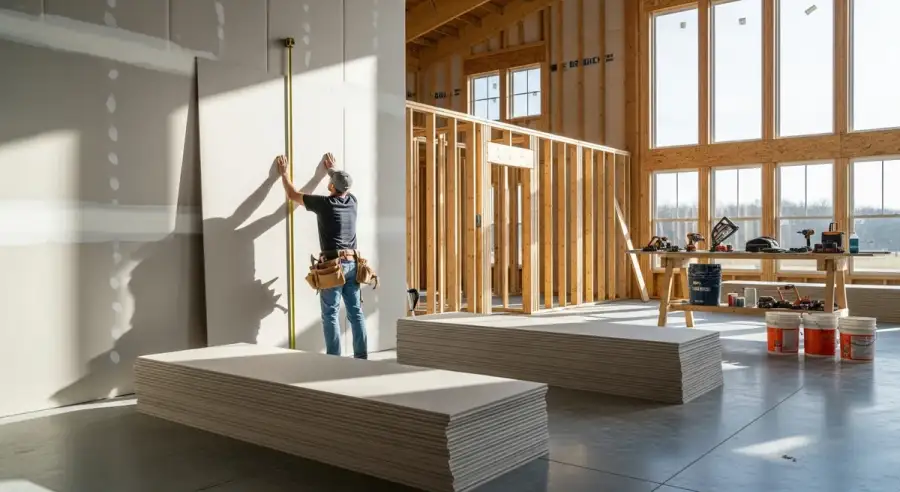
Framing interior partition walls is one of the most accessible trades for owner-builders with basic tool skills. You're working with dimensional lumber (2x4 or 2x6), a circular saw, a framing nailer (rental available), and a level. The work is physically demanding but not technically complex for straight walls in an open plan.
Estimated savings: $4,000 to $10,000 on a 2,000 sq ft build depending on how many partition walls you have.
Where it gets harder: door rough openings, non-load-bearing walls that still need to be plumb and square for drywall, and anything that requires coordination with the electrical or plumbing rough-in. Frame the walls after your mechanical rough-in is planned, not before; moving framed walls after electrical is in them is expensive.
Drywall
Hanging drywall is hard physical work. Finishing drywall (taping, mudding, sanding) requires skill that takes practice to develop. But it's completely learnable, and the cost savings are significant.
The critical factor for SIP buildings: drywall is the prescribed thermal barrier for SIP foam. IRC requires a 15-minute thermal barrier over exposed SIP foam. Drywall satisfies this requirement. If you skip drywall in favor of alternative finishes, make sure your alternative also satisfies the thermal barrier requirement or you'll fail inspection in permitted jurisdictions.
Estimated savings: $8,000 to $18,000 on a 2,000 sq ft build for hanging and finishing.
Painting
Painting is the most universally accessible DIY trade: tools are inexpensive, mistakes are correctable, and the labor savings are real. On a 2,000 sq ft barndominium with 10-foot ceilings and an open plan, you have a lot of square footage to cover.
Budget for quality. Interior paint in a high-humidity Missouri environment benefits from mold-resistant formulations in bathrooms and kitchens. Semi-gloss on trim, eggshell or satin on walls, flat on ceilings. The material cost difference between cheap and quality paint is $200 on a full interior, not the place to cut corners.
Estimated savings: $4,000 to $10,000 in labor.
Flooring
Luxury vinyl plank (LVP) flooring is the dominant choice in barndominium interiors for good reason: it's DIY-installable by anyone who can follow instructions, it's waterproof, it handles the temperature swings of a rural building (especially important before HVAC is running full-time), and it looks genuinely good.
Polished concrete is a popular alternative that needs no floor covering at all: you already have the slab. A concrete polishing contractor can diamond-grind and seal your existing slab to a high-gloss or matte finish for $2 to $5/sq ft, far less than any floor covering.
Tile work in bathrooms and kitchens is DIY-able but requires more skill and the right substrate preparation. LVP for main areas, tile for wet areas, is a common and sensible split.
Estimated savings: $8,000 to $20,000 on a 2,000 sq ft build depending on flooring type.
Cabinet Installation
Stock cabinets, whether they come pre-assembled or RTA (ready-to-assemble), can be installed by any owner-builder with a level, a drill, and patience. The wall cabinets are the harder part: holding heavy cabinets level while fastening them requires a second person or a cabinet lift (inexpensive rental). Base cabinets are straightforward.
Estimated savings: $3,000 to $8,000 in installation labor. Cabinet procurement itself is still a purchase; this saves only the installation labor.
What to Hire Out
Electrical Rough-In
SIP panels have factory-cut electrical chases. Running wire through those chases, installing the panel, and connecting everything to code is work that benefits from a licensed electrician, both for safety and because many Missouri jurisdictions require a licensed electrician to pull the electrical permit even on owner-builder projects.
You can do finish electrical (installing outlets, switches, and fixtures after rough-in inspection passes) yourself in most jurisdictions. The rough-in (panel sizing, circuit planning, wire gauge selection, and physical installation) is the part to hire out.
Plumbing Rough-In
Plumbing rough-in in a slab-on-grade build requires the under-slab work to have been done before the slab was poured (ideally). If it wasn't (if you're retrofitting plumbing into an existing slab), that's saw-cutting, trenching, and running drain lines under concrete. This is not owner-builder territory for most people.
Even with pre-planned under-slab plumbing, rough-in above the slab requires knowledge of drain slope, vent stack sizing, and pressure test requirements. Hire this out. Plumbing mistakes are expensive to find and more expensive to fix after walls are closed.
HVAC
Mini-split installation involves refrigerant work that requires EPA 608 certification. The line set connections, refrigerant charging, and electrical connections for the outdoor condensing unit are all licensed-trade work. The interior head unit mounting and condensate drain are manageable DIY tasks, but the commissioning of the refrigerant system is not.
The Realistic Timeline
A motivated owner-builder doing the DIY trades on a 2,000 sq ft SIP Homestead Shell can typically complete the interior in 6 to 12 months of weekend and evening work. Full-time owner-builders (i.e., people who aren't working another job while building) can finish in 3 to 6 months.
The most common mistake is underestimating the time required for drywall finishing, specifically sanding. Plan for twice as long as you think it will take, and budget for a drywall finisher to come in and fix anything that isn't level before you paint. Fresh eyes on mud work will always find things you've become blind to.
The Bottom Line on Savings
A realistic DIY finish on a 2,000 sq ft Homestead Shell, doing framing, drywall, paint, flooring, and cabinet installation yourself while hiring out electrical, plumbing, and HVAC, saves approximately $30,000 to $60,000 compared to hiring all interior trades. That's the real number. It requires skill, time, and a high tolerance for dusty weekends, but it's achievable, and many owner-builders have done exactly this.