

How Do I Finish the Inside
of a Barndominium Shell?
Once the crew packs up and your Homestead Shell is dried-in, what you're looking at is a precision-engineered SIP vault, not an unfinished house. Here's the 4-phase roadmap to taking your shell to a finished, high-performance home.
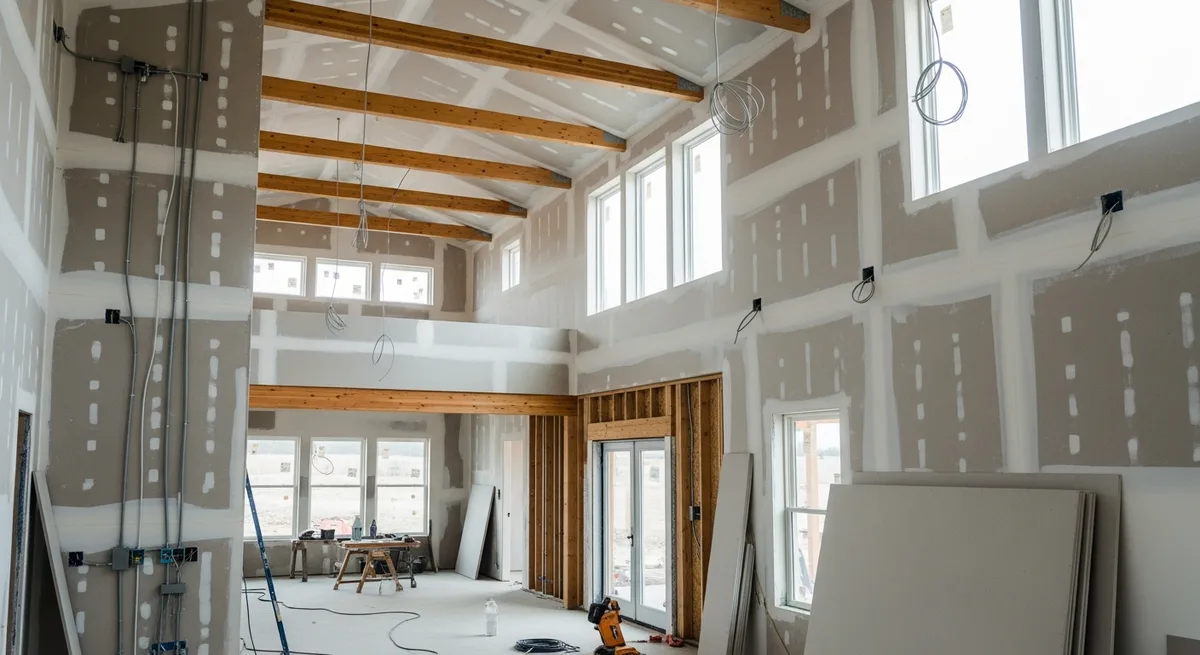
“Don't spend all this money on a high-tech, precision-engineered shell only to finish it like a 1970s subdivision house. Use the strength of the OSB: skip the drywall where it makes sense and use 23/32-inch wood panels or fire-retardant coatings instead. It's tougher, it looks better, and it lets you mount anything, anywhere. For the air, go with mini-splits and an ERV. If you choose central air, you're just paying to cool the inside of your ducts before you ever feel it in your living room.”
John Piazza Norton, Founder, DreamStart Building Company
Finishing a SIP shell follows 4 phases: (1) rough-in utilities, (2) thermal barrier and HVAC, (3) interior framing and drywall, (4) finishes and fixtures. Mini-splits outperform central air in a SIP vault, usually sized smaller than a stick-built equivalent. Budget 55 to 65% of your total project for the interior finish-out.
Mechanical Rough-In (MEP)
Before you build a single interior wall, handle the systems that live behind them. Because SIPs are solid-core, the rough-in process is actually faster than traditional framing.
Electrical & the SIP Advantage
The SIP panels in a Homestead Shell come with pre-manufactured electrical chases: horizontal and vertical channels inside the foam core.
Plumbing Strategy
In 2026, PEX piping is the standard for barndominiums. It handles the minor expansion and contraction of large-span buildings better than rigid copper.
HVAC Strategy: Scalpels vs. Sledgehammers
Because a Homestead Shell is virtually airtight, your HVAC needs to be surgical. You need precision, not a massive central system hammering your air.
Multi-Zone Mini-Splits
The ERV (Energy Recovery Ventilator)
With mini-splits or central air, a SIP home requires an ERV. Because your home doesn't "leak" like a stick-built house, you need a mechanical way to bring in fresh Missouri air.
Interior Finish & Thermal Barrier Code
Per the International Residential Code (IRC), the foam core in a SIP panel must be separated from the interior by an approved 15-minute thermal barrier. This is where homeowners often make expensive mistakes.
Three Approved Approaches
23/32-inch Wood Structural Panels (Plywood or OSB)
If you want an automatic pass from the building inspector while gaining maximum durability, use 23/32-inch (roughly 3/4") plywood or OSB.
1×6 Tongue-and-Groove Wood (T&G)
Cedar or pine shiplap looks incredible, but 1×6 T&G alone is generally NOT an approved thermal barrier.
Intumescent Coatings
If you want to keep the original interior OSB skin of your SIP panels exposed and painted, use a tested intumescent paint. These coatings expand under heat to protect the foam core, meeting the 15-minute thermal barrier requirement without adding the bulk of a second wall layer.
Surfaces & the Shop Partition
Polished Concrete Flooring
Since you're building on a slab, the most cost-effective and authentic barndo choice is to grind and polish the foundation itself. It's indestructible, easy to maintain, and looks incredible with industrial or farmhouse decor, and it costs a fraction of tile or hardwood.
The Shop-Home Partition
The wall separating your living space from your shop is a critical safety feature, not a design choice. Beyond the shop wall, every interior partition (bedroom dividers, bathroom walls, closets) gets framed in after the shell is up. See our full guide to framing interior partition walls in a barndominium shell.
Finish Like You Build
“Don't spend all this money on a high-tech, precision-engineered shell only to finish it like a 1970s subdivision house. Use the strength of the OSB: skip the drywall where it makes sense and use 23/32-inch wood panels or fire-retardant coatings instead. It's tougher, it looks better, and it lets you mount anything, anywhere. For the air, go with mini-splits and an ERV. It's the smartest match for a SIP vault. If you choose central air, you're just paying to cool the inside of your ducts before you ever feel it in your living room. Build smart, finish smarter.”
John Piazza Norton, Founder, DreamStart Building Company
Your Home, Your Standards
Finishing a Homestead Shell is about respecting the precision already built into the walls. You've invested in a structure that is stronger, tighter, and more efficient than a standard house. Don't let an old-school finishing technique compromise that performance.
Pick the rugged utility of 23/32" wood panels or the surgical efficiency of a mini-split system; either way, the goal is a space that works for how you actually live. Follow the thermal barrier codes, prioritize airtight mechanics, and your barndominium will remain comfortable, safe, and cheap to operate for decades. You've got a high-performance shell. Finish it with the same level of integrity.
When it comes time to hire the people who execute the finish-out, finding reliable finish crews in rural Missouri is its own skill, one worth researching before you reach that phase.
Related Reading
Owner-Builder Series · Step 5 of 6
Next: How Long Do Barndominiums Actually Last?
Lifespan data, maintenance schedule, Missouri storm resistance specs, and what actually fails over time, with honest disclaimers.
View complete series hub →About DreamStart
We used to build barndominiums and homestead shells with our own hands, and that experience is exactly what taught us where the real value lies: in getting the design right, planning the build carefully, and working successfully alongside local builders hired by owners. That hands-on experience helps us prepare clearer planning and handoff materials, but it does not make DreamStart the party choosing your contractor. DreamStart now operates as a pre-construction planner and design advisor, not a builder, general contractor, installer, or construction manager. We produce your custom drawings and documentation, coordinate engineering only when your county or lender requires it, and guide site-readiness and logistics. DreamStart designs the plans, organizes the steps, and quotes the EPS panel price; your local builder buys the panels directly from EPS at that price and sets them. We do not self-perform or include general-contractor labor, excavation, foundations, shell erection, utilities, or finish-out. That work is performed by your local builder and trades you retain, contract, and pay directly. We help you find a general contractor and hold a three-way interview, then hand off a clear written plan. DreamStart does not perform or manage field construction; each owner independently selects, contracts, pays and schedules their contractors. Verify the GC's qualifications, insurance, permit requirements, and lender requirements with the appropriate local authorities and your lender.
Take the Next Step
Ready to Price Your Homestead Shell?
DreamStart designs the plans, organizes the steps, and quotes the EPS panel price; the local builder you hire buys the panels directly from EPS at that price and sets them. Your GC handles construction. Get your custom estimate free, no obligation.