

How to Prep Your Slab for a SIP Shell Delivery
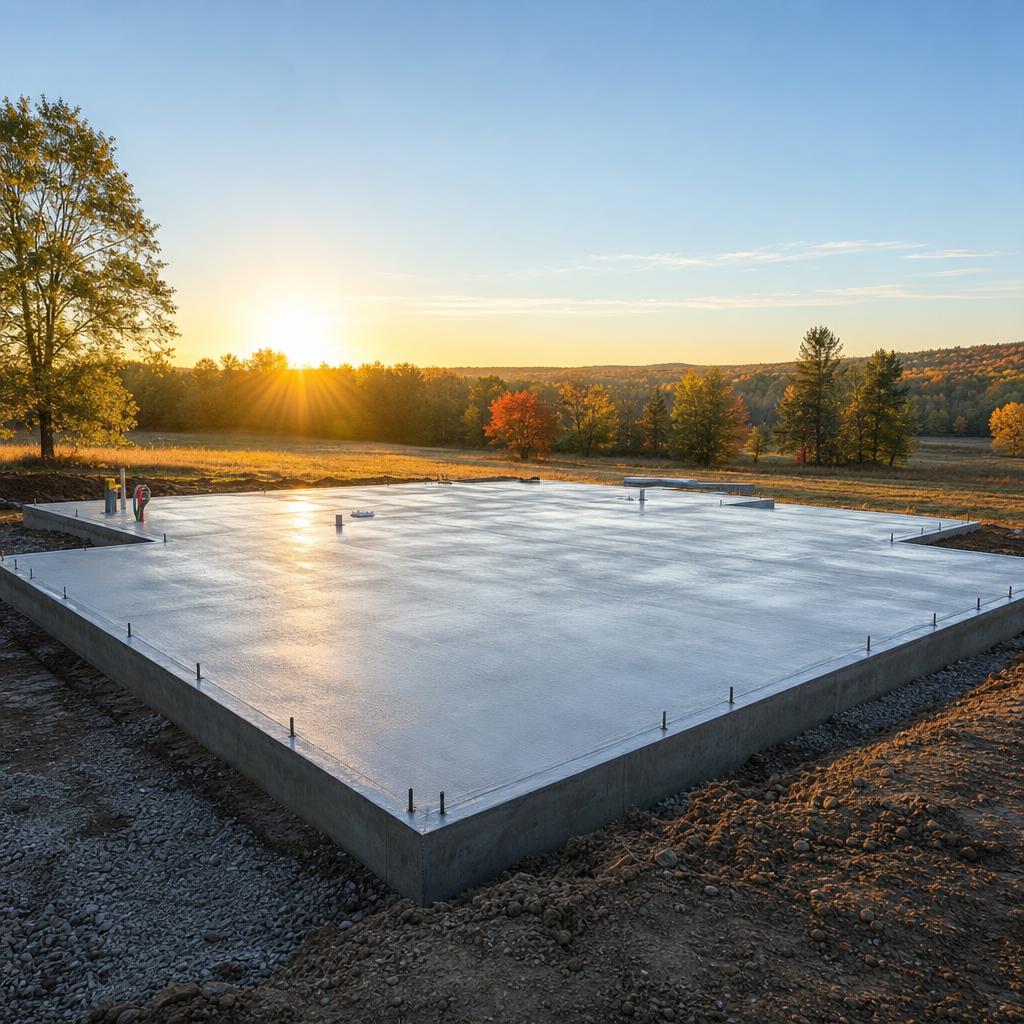
Your concrete pour is done, and the SIP panels are being fabricated in Graettinger, Iowa. Before the local builder you hired mobilizes to set them, the slab must be ready—not just set. There are five specific items that should be checked before panel delivery day; if any are wrong, the owner and GC may need to reschedule assembly.
TL;DR: Your slab needs the cure time specified for your project, anchor bolts matching the engineered drawings, a perimeter that's within 3/8" of level, all utility sleeves in place before the pour, and clear truck access to the site. These items help your local builder set the panels as planned; assembly timing depends on the project and crew.
Why Slab Prep Is the Builder's Bottleneck
A SIP shell erection is precision assembly. The panels are factory-cut to exact dimensions based on your engineered drawings. When the crew shows up, they're not improvising — they're following a sequence that assumes your foundation is within spec. Any deviation means field modifications, which means cost and time you weren't planning for.
The good news: getting the slab right is completely within your control as the owner-builder. DreamStart provides a foundation specification package as part of your design agreement — everything your concrete contractor needs. The checklist below covers what we verify before scheduling delivery.
The 5-Point Slab Readiness Checklist
28-Day Cure Complete
Concrete reaches roughly 70% of its rated strength at 7 days and full strength at 28 days. A shell going up at 7 days puts load on anchor bolts embedded in concrete that hasn't reached design strength. If you pour in October and want to build in November, plan the timeline accordingly. DreamStart won't schedule delivery before the 28-day mark.
Anchor Bolts Match Your Engineering Drawings
DreamStart provides a foundation/anchor bolt specification as part of your design package. Your concrete contractor must follow this exactly — bolt diameter, embedment depth, spacing, and location within 12" of each corner. Bolts placed even 2" off from spec can force time-consuming field modifications on build day.
Perimeter Within 3/8" of Level
SIP wall panels are factory-cut to a precise height. The sill plate that anchors them to your foundation needs a flat, level surface. High spots can be ground down. Low spots require shimming the sill plate, which adds time. Ask your concrete contractor to float the perimeter band carefully and check with a long straightedge before the concrete sets.
All Utility Sleeves Installed Before the Pour
Every utility penetration through the slab — electrical conduit, water supply, sewer lines, gas stubouts, and plumbing drain/waste/vent for every wet room — must be sleeved before the concrete pour. Core drilling after the fact is expensive and weakens the slab. DreamStart's drawings include a foundation plan showing required penetrations. Hand this to your plumber and electrician before the pour date.
Clear Truck and Crane Access
Your SIP panels arrive on a flatbed truck. The driver needs a clear, firm path to within approximately 50 feet of the slab. If your site has soft ground, gravel staging areas, or narrow entry points, address these before delivery. The crew also needs overhead clearance for setting roof panels — no low-hanging utility lines over the build site.
What Your Concrete Contractor Needs From DreamStart
When you start the design agreement and begin the engineering process, DreamStart produces a complete foundation specification package. This includes:
- Slab dimensions with exact perimeter dimensions
- Anchor bolt layout drawing with spacing and corner requirements
- Sill plate detail showing bolt diameter and embedment depth
- Foundation penetration plan showing utility sleeve locations
- Minimum slab thickness and reinforcement spec
- Thickened-edge or grade beam requirements if your engineering requires it
Hand this package to your concrete contractor before they pour. A good concrete contractor will follow it exactly. If they push back on any spec, call us — there may be a legitimate site-specific reason to modify, but changes need to go through engineering, not get improvised in the field.
“The slab is the one part of the build you can't do over. If anchor bolts are wrong, you're grinding concrete and epoxy-setting new ones — which costs more and takes longer than getting it right the first time. The foundation package we provide is the roadmap.”
John Piazza Norton — Founder, DreamStart Building Company
Common Slab Mistakes That Delay Delivery
Anchor bolts placed by eye rather than the engineering drawing
Bolts end up inside the sill plate footprint or in the wrong location, requiring field correction
Pouring before utility sleeves are in place
Core drilling costs $300–500 per penetration and weakens the slab
Scheduling delivery at 14 days post-pour
Crew arrives, can't proceed, rescheduling pushes your build 2–4 weeks
High perimeter spots from floating technique
SIP panels won't sit plumb without grinding or shimming — adds half a day to erection
No site access plan for delivery truck
Truck can't reach the slab, panels have to be hand-carried further than planned
What Happens After the Slab Is Ready
Once your slab passes the readiness check, DreamStart arranges delivery of the panel package for the local builder you hire to set. You establish the assembly schedule with that builder under your separate contract. Here's what the next 5 days of GC assembly may look like:
- Day 1: Flatbed delivery, sill plate installation, first wall panels set
- Day 2: Remaining wall panels, window and door bucks framed
- Day 3: Ridge beam set, roof panels begin
- Day 4: Roof panels complete, metal roofing starts
- Day 5: Metal cladding complete, windows and doors set — shell is weather-tight
After erection, the building is weather-tight and ready for your finish crew. Interior partition walls, mechanical rough-in, insulation details, and finish work all happen inside a protected structure. That's the handoff point — and the beginning of Phase 2.
Ready to start your design process and get your foundation specification package? The instant calculator gives you a real shell price in under a minute, and a free discovery call with John walks you through what your specific site needs.
Frequently Asked Questions
How long does concrete need to cure before a SIP shell can be erected?
28 days minimum. Concrete reaches roughly 70% of design strength at 7 days and full strength at 28 days. Erecting earlier puts anchor bolt loads into under-cured concrete.
What are the anchor bolt requirements for a SIP shell foundation?
Bolt specifications are in the engineering drawings DreamStart provides. Typically 1/2" J-bolts or L-bolts at 7" embedment, spaced per the perimeter layout. Match the drawings exactly — field deviations cause delays.
What flatness tolerance does a SIP shell slab need?
The perimeter band where the sill plate sits must be within 3/8" of level across its full length. The interior can be less precise.
What utility sleeves need to be in the slab before the shell arrives?
All penetrations — electrical conduit, water supply, sewer exits, gas lines, and plumbing rough-in for every wet room — must be sleeved before the pour. Core drilling after costs $300–500 per penetration.
Does the slab need to be interior-finished before shell delivery?
No. Only structurally complete, cured, and with sleeves installed. Decorative finishes (stained concrete, epoxy, tile) happen after the shell is weather-tight.
Post-Shell Handoff Series · 1 of 5
Read next in series
Interior Partition Walls in a Barndominium: What to Know After Shell Delivery
About DreamStart
We used to build barndominiums and homestead shells with our own hands — and that experience is exactly what taught us where the real value lies: in getting the design right, planning the build carefully, and working successfully alongside local builders hired by owners. That hands-on experience helps us prepare clearer planning and handoff materials, but it does not make DreamStart the party choosing your contractor. DreamStart now operates as a pre-construction planner and design advisor — not a builder, general contractor, installer, or construction manager. We produce your custom drawings and documentation, coordinate engineering only when your county or lender requires it, and guide site-readiness and logistics. DreamStart designs the plans, organizes the steps, and gets the EPS panels ordered and delivered at the quoted package pricing for your local builder to set. We do not self-perform or include general-contractor labor, excavation, foundations, shell erection, utilities, or finish-out — that work is performed by your local builder and trades you retain, contract, and pay directly. We help you find a general contractor and hold a three-way interview, then hand off a clear written plan. DreamStart does not perform or manage field construction; each owner independently selects, contracts, pays and schedules their contractors. Verify the GC's qualifications, insurance, permit requirements, and lender requirements with the appropriate local authorities and your lender. The plans are yours to keep, even if you build elsewhere.
Take the Next Step
Ready to Price Your Homestead Shell?
DreamStart designs the plans, organizes the steps, and gets the EPS panels ordered and delivered at the quoted package pricing for the local builder you hire to set. Your GC handles construction. Get your custom estimate free, no obligation.