

Barndominium HVAC Guide:
Mini-Splits, Sizing & the ERV You Can't Skip
The rules of thumb that work fine in a subdivision house will oversize your system and waste money in a barndominium. Here's the correct math.
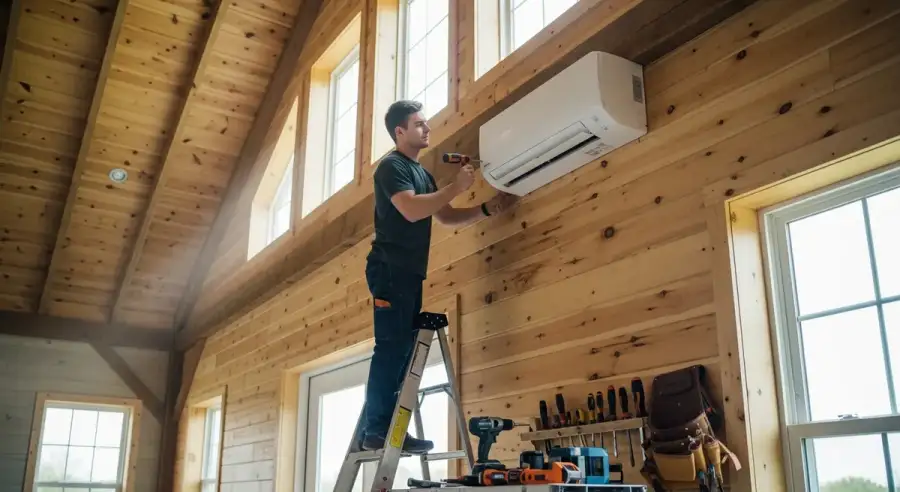
“I've watched contractors quote a 5-ton central air unit for a 2,000 sq ft SIP shell because 'that's what the size chart says.' A 3-ton mini-split does the job better and costs thousands less, because the chart was written for houses that leak. Your SIP shell doesn't leak. Don't let a contractor price it like it does.”
John Piazza Norton, Founder, DreamStart Building Company
The standard HVAC rule of thumb (20 BTUs per square foot) was written for 8-foot ceilings in leaky stick-built houses. In a SIP-enclosed barndominium, you need 25 to 33% fewer BTUs because the envelope doesn't leak. A mini-split paired with an Energy Recovery Ventilator (ERV) is the correct system for any high-performance shell. The single most expensive HVAC mistake in a barndo build is letting a contractor size the system from square footage alone instead of running a proper Manual J load calculation.
1. The Baseline: Sizing Mini-Splits for Open Spaces
Building a barndominium presents a unique thermal challenge. You are turning a large structural shell, often with massive open volumes and vaulted ceilings, into a cozy, energy-efficient home. Because of that scale, the standard HVAC "rules of thumb" usually lead to drafty winters and expensive, humid summers.
Traditional central air requires bulky ductwork that clashes with the industrial aesthetic of a barndo. This is why ductless mini-splits have become the industry standard. They allow for zoning: you only heat or cool the areas you are actually using.
The BTU Math
In a standard home with 8-foot ceilings, you need roughly 20 BTUs per square foot. Barndominiums are rarely standard. Adjust your sizing based on your build's specifics:
| Square Footage | Standard Build (Fiberglass / Batt) | High-Performance Build (SIPs / Spray Foam) |
|---|---|---|
| 500 sq ft | 12,000 BTU (1 ton) | 9,000 BTU (0.75 ton) |
| 1,000 sq ft | 24,000 BTU (2 ton) | 18,000 BTU (1.5 ton) |
| 1,500 sq ft | 36,000 BTU (3 ton) | 27,000 BTU (2.25 ton) |
| 2,000 sq ft | 48,000 BTU (4 ton) | 36,000 BTU (3 ton) |
| 2,500 sq ft | 60,000 BTU (5 ton) | 45,000 BTU (3.75 ton) |
These are planning figures only. Always get a Manual J calculation before purchasing equipment (see Section 5).
2. The Insulation Spectrum: From Standard to Superior
The efficiency of your mini-split is dictated entirely by how well your walls hold onto conditioned air. Under-insulate, and your mini-split runs 24/7, shortening its lifespan and driving up your electric bill. Here's how the three main approaches stack up.
Traditional Stud & Batt
Many DIY barndos use traditional wood or steel studs with fiberglass batts. It's cheap at the supply house, and it costs you every month after.
The Flaw: Steel studs are thermal bridges; they carry heat from the outside metal skin directly into your living space, bypassing the insulation entirely. You must oversize your mini-split by 15 to 20% just to fight constant thermal transfer.
Closed-Cell Spray Foam
Closed-cell spray foam is a major step up because it provides an air seal that fiberglass batt simply cannot. It stops the drafts common in metal buildings.
HVAC Impact: You can usually stick to standard BTU calculations without much padding. The tradeoff: spray foam has known fire-wicking concerns, and many insurance underwriters have started flagging metal buildings with DIY spray foam applications.
SIP Panels (Structural Insulated Panels)
SIPs are a different beast entirely. Instead of a frame stuffed with insulation, the wall is the insulation: a solid EPS foam core sandwiched between two structural OSB layers, factory-bonded under pressure. There are no stud gaps, no thermal bridges, no voids where insulation slumps over time.
HVAC Impact: You downsize 25 to 33% versus a standard build (see the BTU table above). That savings often exceeds $3,000 to $5,000 at equipment purchase alone, before you count the monthly utility reduction.
3. Why SIPs Change the HVAC Equation
If you are still in the planning stages, it's worth understanding exactly how a SIP envelope changes your long-term HVAC costs. The payoff is mechanical efficiency, not just "being green."
Airtightness
Oak Ridge National Laboratory measured about 15 times less air leakage in a SIP room than in a 2x6 stick-framed room. In a traditional build, your mini-split conditions 'new' air that leaks through the walls constantly. In a SIP home, you control every cubic foot of air the system touches.
Smaller Equipment
Because thermal resistance is so high, you can rightsize. A Manual J load calculation on a SIP shell usually calls for smaller equipment than the same footprint in a stick-framed barndo.
The Flywheel Effect
SIPs create a stable interior temperature. Once your mini-split reaches 70°F, the building holds there. This lets the mini-split run in its most efficient low-power mode for hours at a time, instead of cycling aggressively.
4. The Hidden Necessity: Mechanical Ventilation
There is a catch to any high-performance build.
When you make a barndominium perfectly airtight (whether with SIPs or spray foam), you trap moisture and CO₂ inside. A leaky stick-built house breathes. Yours won't. That's the point, but it means you must include an Energy Recovery Ventilator (ERV).
How an ERV Works
Swaps stale indoor air for fresh outdoor air continuously
Pre-treats incoming air using the temperature of outgoing air, recovering 70 to 80% of thermal energy
Manages humidity, which is the one thing mini-splits struggle with when they aren't running long enough
Eliminates the 'stuffy' feeling that kills the experience in otherwise excellent high-performance builds
Budget roughly $1,200 to $2,500 installed for a whole-house ERV in a 2,000 sq ft barndominium. That cost is recovered within 2 to 3 years in utility savings and equipment longevity alone; your mini-split doesn't have to work as hard to manage humidity when the ERV is handling fresh-air exchange.
What DreamStart Handles vs. What You Arrange
DreamStart handles:
- ✓Designing a shell with R-26+ continuous walls and an airtight envelope, the foundation every HVAC contractor needs
- ✓Providing correct wall R-values and shell specs as inputs for your Manual J calculation
- ✓Guidance on which contractors in Missouri are experienced with SIP load sizing
You arrange:
- →Hiring a licensed HVAC contractor who will run a proper Manual J (insist on it)
- →Equipment selection and ERV specification with your contractor
- →Installation and commissioning after the shell is dried-in
Your HVAC system is only as good as the shell it's conditioning. Schedule a design consultation to make sure your shell specs are dialed in before you talk to an HVAC contractor.
5. Choosing Your Strategy (And the Manual J Rule)
If You're Retrofitting a Leaky Pole Barn
Focus on oversizing your mini-split slightly (15 to 20%) and adding as much spray foam as your budget allows. Start with the ceiling: heat loss through an uninsulated metal roof will overwhelm any wall improvements you make first.
If You're Building From Scratch
SIP panels offer the most predictable thermal performance available. You spend more on the shell upfront and save on every other line item: smaller HVAC unit, lower monthly utilities, better appraisal, and less maintenance. Some owners pair a mini-split with a wood or pellet stove as a backup heat source and ambiance feature; if that appeals to you, see our guide on installing a wood stove in a SIP home.
The Manual J Rule: Non-Negotiable
Regardless of which path you take: insist on a Manual J load calculation. Don't let a contractor size your equipment from square footage alone. Manual J accounts for ceiling height, window area, orientation, wall R-value, and local climate data. A proper calculation costs $150 to $400. The wrong unit size costs thousands over the life of the system.
Any HVAC contractor who refuses to run a Manual J and just quotes "X tons for Y square feet" is pricing to their comfort, not yours.
The Shell Determines What Your HVAC Costs
Start With the Right Envelope
A SIP shell with R-26+ continuous walls means smaller equipment and lower bills for life. Get your shell estimate, then size your system to match.
Related Reading
How to Finish the Inside of a Barndominium Shell
The complete interior guide: thermal barrier code, drywall alternatives, electrical chases, and why mini-splits beat central air.
Heating GuideInstalling a Wood Stove in a SIP Home
Clearances, combustion air, and how to safely add a wood stove or pellet stove as a backup heat source in an airtight SIP shell.
Cost AnalysisAre SIP Panels Worth the Extra Cost?
The hidden savings (labor offset, HVAC downsizing, and appraisal documentation) with real Missouri numbers.
Buyer's GuideHow to Insure a Barndominium in Missouri
Why SIP construction sidesteps the spray foam red flag that kills most barndominium insurance applications.
Owner-Builder HubShell to Move-In: The Full Owner-Builder Roadmap
Every phase from shell delivery to move-in day: trades, sequencing, and decisions in order.
Owner-Builder Series · Step 4 of 5
Next: How Long Do Barndominiums Actually Last? Lifespan & Storm Safety
Real component lifespans, Missouri wind-load data, and what the EF-scale specs say about SIP performance in severe weather.
View complete series hub →About DreamStart
We used to build barndominiums and homestead shells with our own hands, and that experience is exactly what taught us where the real value lies: in getting the design right, planning the build carefully, and working successfully alongside local builders hired by owners. That hands-on experience helps us prepare clearer planning and handoff materials, but it does not make DreamStart the party choosing your contractor. DreamStart now operates as a pre-construction planner and design advisor, not a builder, general contractor, installer, or construction manager. We produce your custom drawings and documentation, coordinate engineering only when your county or lender requires it, and guide site-readiness and logistics. DreamStart designs the plans, organizes the steps, and quotes the EPS panel price; your local builder buys the panels directly from EPS at that price and sets them. We do not self-perform or include general-contractor labor, excavation, foundations, shell erection, utilities, or finish-out. That work is performed by your local builder and trades you retain, contract, and pay directly. We help you find a general contractor and hold a three-way interview, then hand off a clear written plan. DreamStart does not perform or manage field construction; each owner independently selects, contracts, pays and schedules their contractors. Verify the GC's qualifications, insurance, permit requirements, and lender requirements with the appropriate local authorities and your lender.
Take the Next Step
Ready to Price Your Homestead Shell?
DreamStart designs the plans, organizes the steps, and quotes the EPS panel price; the local builder you hire buys the panels directly from EPS at that price and sets them. Your GC handles construction. Get your custom estimate free, no obligation.