

✓ Easy Shell Kit Customization
Barndominiums With Porches | Built Into Your Shell Package
No custom welding. No structural gymnastics. SIP shells tie in timber-frame porch elements at the roofline cleanly. Use the calculator to budget out porch square footage alongside your shell.
Price My Shell + Porch →Why Porches and SIP Shells Work So Well Together
The traditional barndominium — rigid steel red-iron framing — has a real structural problem when it comes to wrap-around porches. To tie a porch roofline into a rigid steel frame, you need custom-welded connections at every column. That means a fabricator, a welder, and a structural engineer stamp on the connection detail. It adds cost, complexity, and weeks to the schedule.
A SIP Homestead Shell works differently. The exterior walls are structural panels, not a steel moment frame. Tying in a covered porch roofline uses conventional timber-frame connections — treated posts, rafter ties, and ledger boards — that any experienced framing crew handles without specialty equipment. The result looks better, builds faster, and costs less.
Three Porch Configurations That Work on a Homestead Shell
1. The Full Wrap-Around (Three or Four Sides)
The most dramatic option — 10 to 14 feet of covered porch on three or four sides of the building. This creates distinct outdoor living zones: morning east side, shaded afternoon west side, and a main south-facing entertaining area. Common on 40x60 and 50x80 footprints where the building mass justifies the porch depth.
Budget range: $22,000–$45,000 depending on footprint and post style.
Best for: Primary residences where outdoor living is a priority, properties with multiple view directions.
2. The Front and Side L-Wrap
Porch extends across the full front of the building and wraps one side — usually the side facing a driveway or view. Creates a welcoming farmhouse arrival sequence without the cost of a full four-sided wrap. Popular on 40x60 gable-end designs where the main entrance is on the eave side.
Budget range: $14,000–$28,000.
Best for: Corner lots, properties with a single primary view, budget-conscious builds that still want the porch feel.
3. The Deep Front Porch
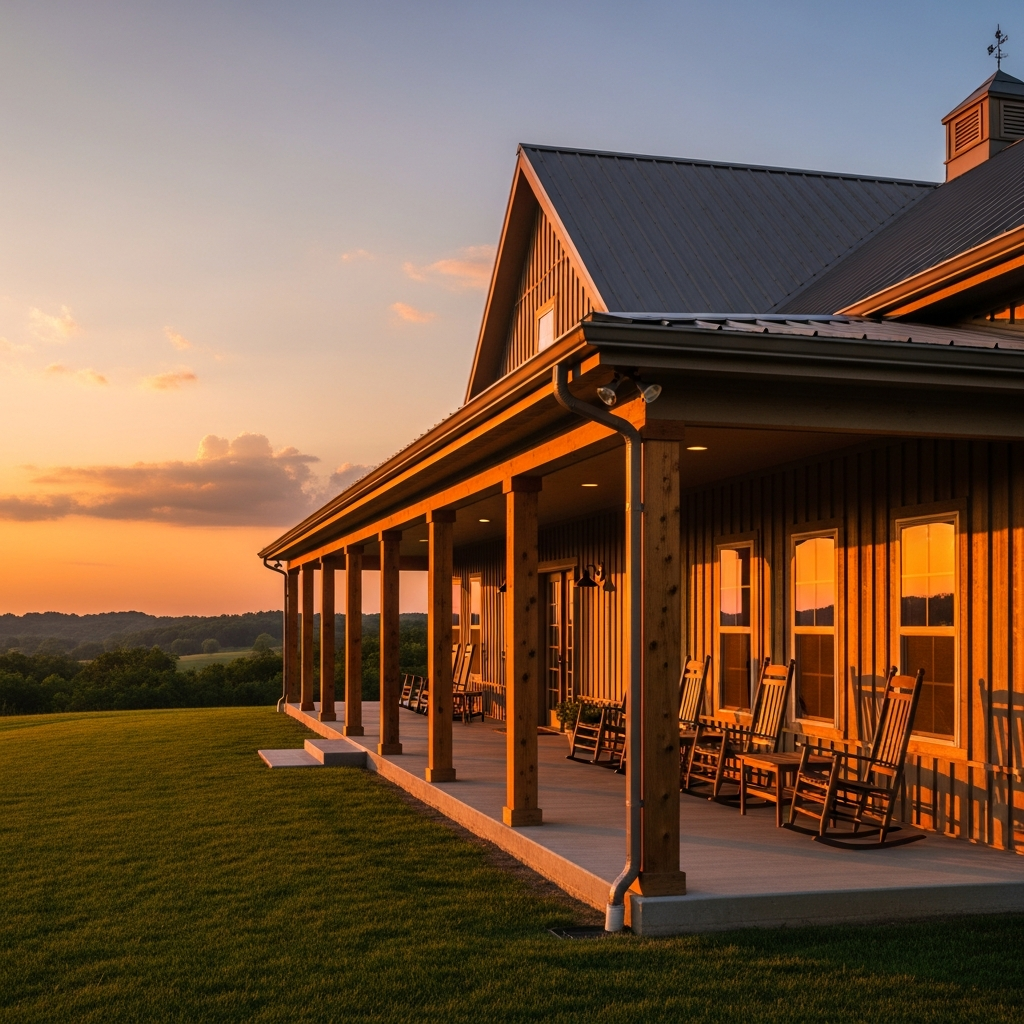
A single-sided covered porch 12–16 feet deep across the full front of the building. This is the workhorse — it adds the farmhouse character most people are after, creates a true outdoor living room, and integrates into the roofline cleanly. Works on virtually any footprint from 30x50 up.
Budget range: $8,000–$18,000.
Best for: Most builds — the right balance of impact and budget efficiency.
Design Details That Make the Difference
A porch succeeds or fails on a few specific decisions:
Post style: Timber-frame Douglas fir posts (6x6 or 8x8) with decorative brackets give the farmhouse look most buyers want. Painted steel tube columns read commercial. The wood ages beautifully against a metal panel exterior.
Ceiling: Tongue-and-groove pine or cedar porch ceiling is the gold standard. It's warm, it photographs well, and it holds up in covered exterior conditions. Painted LP SmartSide works as a lower-cost alternative.
Roof pitch match: The porch roofline should match or closely approximate the main building pitch. A steeper porch shed roof that fights the main roofline looks wrong and is hard to engineer cleanly. Design the porch in from the beginning so the pitches integrate.
Concrete floor: Stained and sealed concrete is the low-maintenance choice. A brushed finish prevents slipping. Composite decking is a popular alternative but adds ongoing maintenance. Avoid wood decking in Missouri's humidity — it requires annual sealing and will eventually rot or warp.
Ceiling fans: Non-negotiable in Missouri summers. Plan the electrical in the porch framing phase — adding ceiling fan boxes after the fact in a covered porch is a nuisance job.
The Roofline Integration
The most important design decision on a wrap-around porch is how the porch roofline connects to the main building roofline. There are two clean approaches:
Shed roof break: The porch roof is a separate lower-pitch shed roof that ties into the main building wall below the eave. This is the simpler construction detail and works well on most footprints. Clear separation between building roof and porch roof is visually clean when executed with a consistent fascia line.
Roofline extension: The main building roofline extends out over the porch — the porch is "under the main roof." This creates a more unified look but requires that the porch be accounted for in the original roof structure. It adds span to the rafters and affects the overall building width calculation. Design this in from the start; retrofitting it is expensive.
On a SIP Homestead Shell, both approaches work cleanly. The SIP roof panels sit on top of the SIP wall panels — the porch framing ties into the wall at the sill plate level, completely separate from the panel system. No panel modifications required.
What to Discuss With Your Builder Before Pricing
Before getting an estimate on a porch addition, nail down these decisions:
- Which sides of the building? (Single, two-sided, three-sided, full wrap?)
- What depth? (8-foot minimum for furniture, 12-foot for outdoor living room feel, 14+ for dining table)
- Roofline integration style? (Shed roof break vs. extension of main roofline)
- Post style and material? (Timber-frame wood vs. steel vs. engineered columns)
- Floor finish? (Stained concrete, composite decking, exposed aggregate?)
- Screen enclosure on any portion? (Planning electrical and framing for future screening adds little cost if done at build time)
Run your shell footprint through our Homestead Shell calculator to get a base estimate, then schedule a call to walk through the porch configuration. We design porch integration into every shell package that includes one — it's not a bolt-on afterthought.