

Missouri Owner-Builder Guide
SIP Shell Construction: From Permit to Move-In
This guide covers every phase of building a Solid-Core SIP Homestead Shell as an owner-builder in Missouri — permitting, land, financing, the panel package, shop drawings, delivery, assembly week, mechanical rough-in, and getting to move-in. It's a long read. It's worth it.
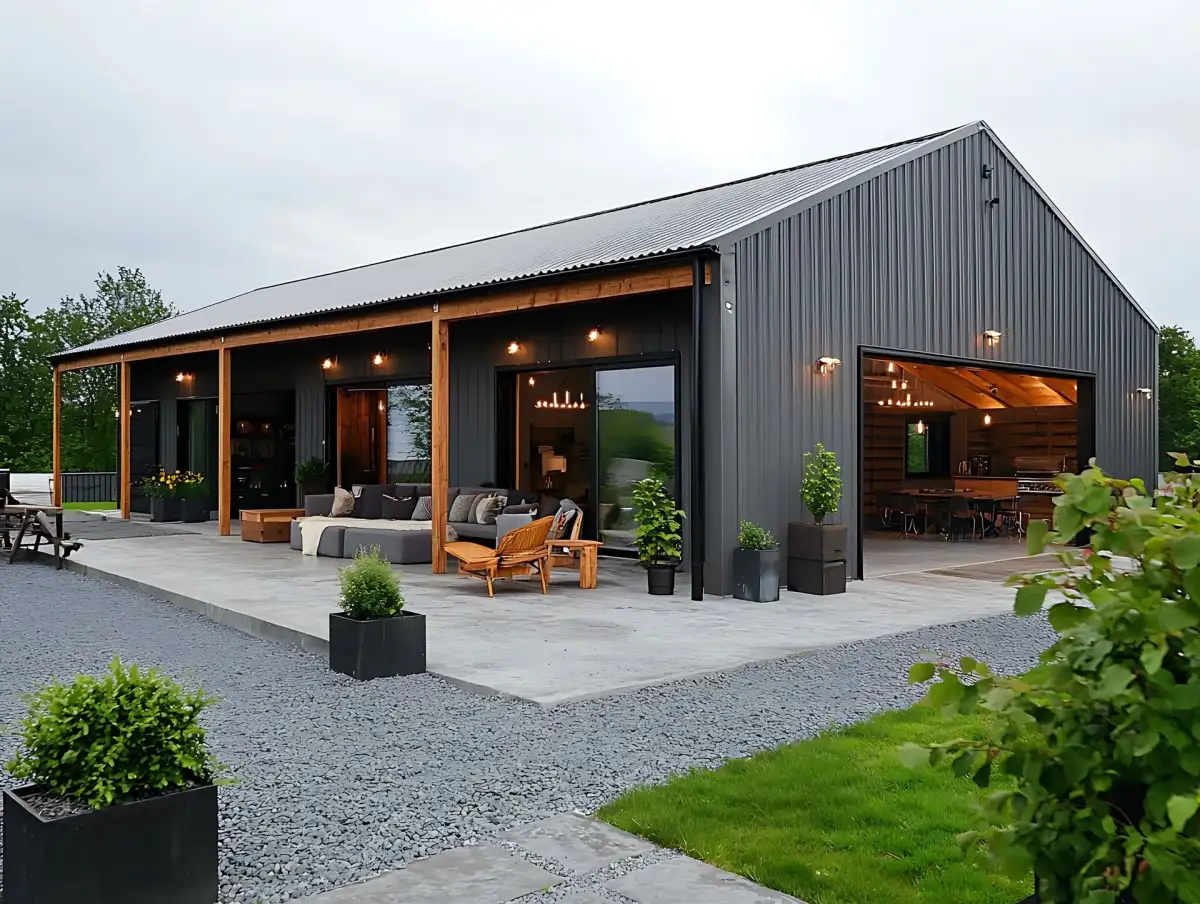
Building a SIP Homestead Shell as a Missouri owner-builder is genuinely achievable — and Missouri's lack of a statewide building code makes it one of the most owner-builder-friendly states in the country. The key insight most people miss: the hardest part isn't the construction. The hard parts are the decisions that happen before you break ground — land, financing structure, permit research, and shop drawing approval. Get those right, and assembly week practically runs itself. DreamStart provides your EPS panel pricing documentation from Graettinger, Iowa with everything pre-planned. Your job is to be ready to receive the panels and have Your local builder standing by for assembly.
What This Guide Is
This guide was written for one specific person: a Missouri landowner (or soon-to-be landowner) who wants to build their own home using SIP panel construction and who isn't afraid to do the work — but also isn't interested in learning expensive lessons on the fly.
It draws on SIPA (Structural Insulated Panel Association) technical best practices — the same documentation used by commercial SIP manufacturers — and translates that into plain-English, Missouri-specific guidance. Where the SIPA docs are written for engineers and architects, this guide is written for you.
DreamStart Building Company is an EPS Authorized Dealer based in St. Joseph, MO — a home designer providing EPS panel pricing documentation. Your local builder secures panels directly from EPS at DreamStart's quoted pricing; those panels are factory-cut in Graettinger, Iowa. We've walked owner-builders through this process from concept to move-in and we've seen where people get stuck. This guide is designed to make sure you don't get stuck in those same places.
Not sure if owner-building is right for you?
Before working through this guide, take five minutes with the owner-builder readiness checklist. It covers land, financing, site, and timeline assumptions that shape every decision in this guide.
What "Shell Construction" Means
DreamStart coordinates the Homestead Shell — the complete structural and insulated envelope of your building. DreamStart advises on the design and provides your EPS panel pricing documentation; the assembly labor is separately quoted and contracted through a local builder you hire. The shell scope includes the foundation-to-ridge SIP walls, SIP roof, all rough openings, framing, engineered connection details, and sealing. What it does not include is interior finish work: drywall, flooring, cabinetry, plumbing fixtures, electrical fixtures, HVAC equipment.
The shell is the hard part to get right. Once the shell is up and weather-tight, the interior finish work follows a much more conventional path — and you can do it yourself, hire subs, or phase it over time.
| Phase | Who Does It | Typical Timeline |
|---|---|---|
| Land & site prep | Owner / site contractor | Variable — weeks to months |
| Permit research & application | Owner (DreamStart provides docs) | 2–8 weeks |
| Financing approval | Owner / lender | 3–8 weeks |
| Design & shop drawings | DreamStart + EPS manufacturer | 4–8 weeks after deposit |
| Panel fabrication | EPS factory in Graettinger, IA | 3–5 weeks after drawing approval |
| Delivery & site staging | Owner / local GC crew | 1 day |
| Shell assembly | Your local builder | 3–5 days |
| Mechanical rough-in (HVAC/electric/plumbing) | Owner / licensed subs | 4–8 weeks |
| Interior finish to move-in | Owner / subs (phased OK) | 3–18 months depending on scope |
Is Owner-Building Right for You?
An honest look at what it takes — and what it doesn't require.
Let's skip the pep talk and be direct about what owner-building a SIP shell actually demands — and what it doesn't.
What It Requires
- Land you own (or are under contract on) with confirmed buildability — zoning, access, no deed restrictions against residential construction
- Time to manage the process: permit research, lender communication, shop drawing review, subcontractor coordination. Plan on 5–10 hours per week for 3–6 months before assembly week.
- A realistic budget with contingency — 10–15% above your estimated shell cost is standard
- The ability to get a telehandler (all-terrain forklift) on site for delivery day — panels are up to 8' × 24' and weigh up to 800 lbs
- A local builder you hire handles assembly and truck unloading/panel staging — DreamStart helps you connect with one; you coordinate site access and ensure the foundation is ready
- Willingness to do the reading: shop drawings, connection details, moisture management — this guide covers the critical items
What It Doesn't Require
- A contractor license — Missouri owner-builders can pull permits under their own name in counties that require them
- Previous SIP experience — that's what Your local builder crew brings
- SIP assembly skills of your own — DreamStart provides your EPS panel pricing documentation and technical documentation; a local builder you hire separately quotes and performs the assembly
- An enormous budget upfront — phased construction is real and common; get the shell up and weather-tight, then finish interior over time
- Perfect land — you'd be surprised how workable a challenging site can be with the right foundation plan
The Honest Challenges
Time is the real currency. Every delay in your build — permit waiting, financing approval, shop drawing revisions, weather, subcontractor availability — costs you carrying costs on your land and/or your construction loan. The people who struggle most with owner-building aren't the ones who run into problems; they're the ones who didn't anticipate that problems were coming.
Decision fatigue is real. You will make hundreds of decisions during a build. The ones that matter most happen early: floor plan, foundation type, wall height, roof pitch, window placement. Get these locked down before shop drawings start.
Subcontractor availability varies by region. In rural Northwest Missouri, finding a good electrician or plumber who is familiar with SIP construction (or willing to learn) can take longer than expected. Start your sub outreach 6–8 weeks before your projected shell completion.
Missouri Permits & Zoning
What you actually need — county by county — and how to find out fast.
Missouri has no statewide residential building code. That's not a loophole — it's state policy. Each Missouri county decides independently whether to adopt a building code and which code to adopt. The practical result: most rural Missouri counties outside city limits have no building permit requirement for residential construction.
This is a genuine advantage for owner-builders and one of the main reasons Missouri is such a strong market for homestead and barndominium construction. But "no permit required" is not the same as "no rules." Read this section carefully.
The Three Scenarios You'll Encounter
No county permit required for residential construction in unincorporated areas. You can break ground without pulling a permit. Your lender, however, may still require engineered drawings and an inspection process — that's a lender requirement, not a code requirement. Septic system and well permits are separate (Missouri DNR / county health).
County has adopted IBC or IRC. You'll need a building permit with plan review. Timeline: 2–6 weeks typical. DreamStart coordinates custom architectural drawings (included with your design deposit) that satisfy most county plan review requirements. Engineering stamps are coordinated only when your county or lender requires them. Budget for permit fees: typically $200–$1,500 depending on county and square footage.
City permits almost always required regardless of county code status. Most cities have adopted the IRC or IBC. Some have additional overlay requirements (floodplain, historic district, aesthetic standards). If your land is inside any city limits, research the municipal code before purchasing.
Best Owner-Builder Counties in Missouri
These Northwest Missouri counties have no adopted residential building code and a strong culture of rural residential construction — making them the most flexible environments for owner-builders:
| County | Code Status | P&Z Office | Drive to St. Joseph |
|---|---|---|---|
| Andrew County | No code (outside Savannah) | Minimal | ~20 min |
| Atchison County | No code | None outside Rock Port | ~45 min |
| Nodaway County | No code | None outside Maryville | ~55 min |
| DeKalb County | No code | Minimal | ~30 min |
| Davies County | No code | None outside Gallatin | ~45 min |
| Caldwell County | No code | Minimal (Cameron area) | ~35 min |
| Clinton County | P&Z exists, issues permits | Active (816-539-3722) | ~25 min |
| Ray County | No code outside Richmond | Minimal | ~50 min |
| Carroll County | No code | None outside Carrollton | ~65 min |
What DreamStart Provides for Permitting
- Engineered drawings (structural, architectural, foundation) coordinated through American Iron or VR Home Design & Drafting — included with the $9,750 design package, which includes a Walk Your Plans visit to walk your full-size floor plan and make final changes. Engineering stamps are coordinated only when your county or lender requires them
- SIP manufacturer engineering documentation and EPS Authorized Dealer certification
- Panel-specific load calculations and connection details
- Energy code compliance documentation (relevant in counties that have adopted IECC or equivalent)
- Guidance on what to bring to your first meeting with the county P&Z office
What Always Requires a Permit (Regardless of Building Code)
Even in zero-code counties, these items typically require separate permits or approvals:
- Septic system installation — Missouri DNR oversees this through county health departments; a licensed installer is required
- Well drilling — Missouri DNR well construction permit required statewide; licensed driller required
- Access driveway permit — county road department or MODOT for highway access points
- Floodplain development — if your land is in a FEMA-mapped floodplain (AE or AO zones), development permits are required regardless of local code status
- Electrical service connection — your electric co-op or utility will have their own inspection requirements for service entrance and meter base
Land, Site & Foundation
Everything below grade and before the first panel goes up.
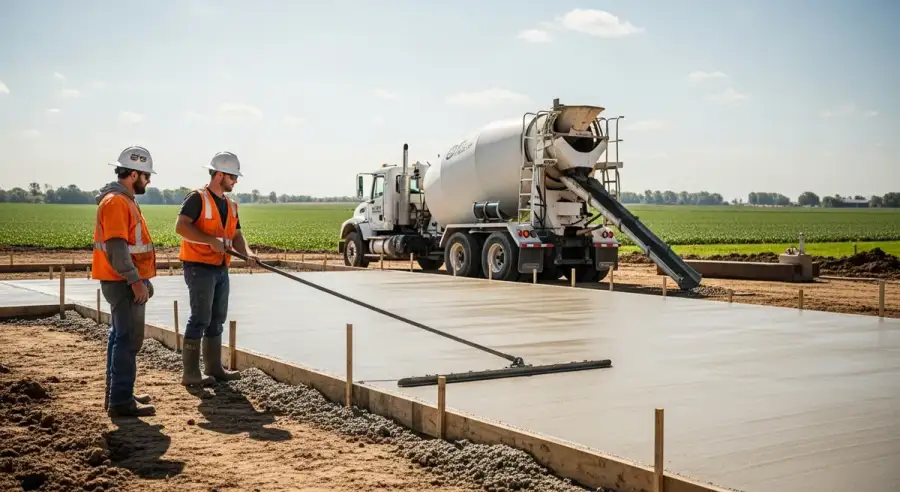
Your foundation is the most permanent, least forgiving thing in your entire build. SIP walls are forgiving in many ways — but they require a square, level foundation. Any error in your slab or stemwall translates directly into difficulty during panel installation.
Land Selection Checklist
- Confirm zoning allows residential construction — call county P&Z or assessor
- Check deed restrictions and covenants — HOAs and deed covenants can restrict construction type even when county code doesn't
- Check FEMA flood map (msc.fema.gov) — floodplain parcels have significant restrictions and insurance consequences
- Confirm road access — county or township road? Who maintains it? Can a flatbed semi get to your site?
- Percolation test if septic required — conduct before finalizing land purchase
- Check for easements (utility, pipeline, drainage) that may limit where you can place the structure
- Verify electric service availability — rural electrification co-ops sometimes have multi-month lead times for new service
- Confirm cell/internet service if important to you — this is rural Missouri, and coverage varies significantly
Site Preparation
Before your foundation crew arrives, the site needs to be cleared, rough-graded to within a few inches of final grade, and accessible by heavy equipment. At a minimum:
- Clear trees and brush from the building footprint plus at least 20 feet on all sides
- Establish a driveway / access route that can handle a semi-truck (delivery) and a concrete pump truck (foundation)
- Rough grade the building pad — target within 6 inches of final elevation across the footprint
- Stage an area at least 40' × 60' adjacent to the building footprint for panel staging during delivery
- If doing septic, coordinate with your site contractor to avoid disturbing the drainfield area during site prep
Foundation Types for SIP Construction
SIP walls can be built on any conventional foundation type. The most common for Homestead Shell construction in Missouri:
A single pour integrating the footing and slab. Cost-effective, works well on flat to gently sloping sites. Requires accurate layout — your SIP walls will be anchored directly to the slab perimeter. Treated sill plate is installed over a capillary break material before walls go up. Plan for your plumbing rough-in to be stubbed through the slab before the pour.
CMU block or poured concrete stemwall with a crawlspace. Useful on sloping sites and preferred by some lenders. Provides access to under-floor plumbing after construction. More expensive than slab. SIP walls bear on the stemwall top plate — again, level and square are critical.
Poured concrete or ICF basement walls with SIP first-floor walls above. Significantly more expensive but adds substantial usable square footage. Works well on sloped sites where daylight basement is possible. Not commonly used for initial owner-builder builds due to cost.
Foundation Accuracy Requirements
SIP panels are factory-cut to exact dimensions based on your approved shop drawings. If your foundation is out of square or out of level, the panels won't fit as designed — and fixing it in the field is expensive and time-consuming. Hold your foundation contractor to these tolerances:
- Square to ±⅛ inch across any 20-foot diagonal measurement
- Level to ±¼ inch across the entire perimeter
- Anchor bolt placement per the engineered drawings — bolts in wrong locations will require field correction
- Slab surface (if applicable) within ¼ inch of flat across any 10-foot span
Your SIP Package — What DreamStart Coordinates
Understanding what's in the box and how it all goes together.
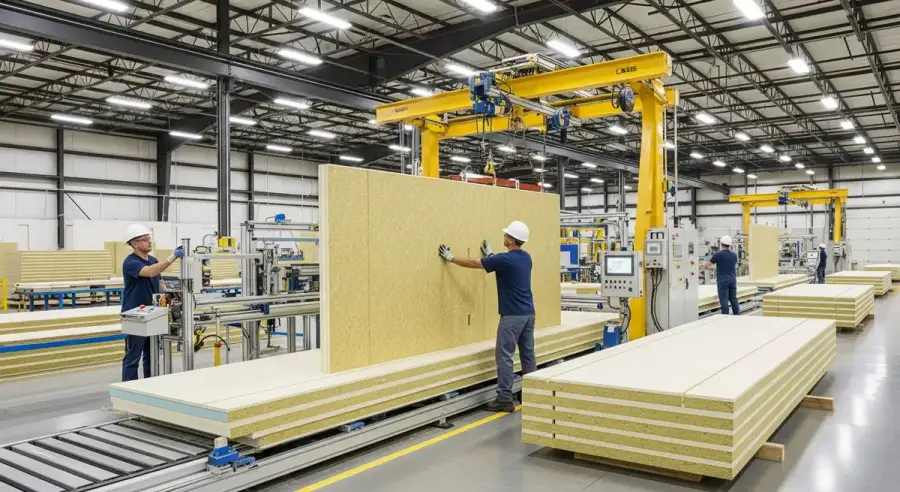
Not all SIP packages are the same — even from the same manufacturer. DreamStart provides your EPS panel pricing documentation as an RTA (Ready-to-Assemble) package, which is the highest level of factory prefabrication available. Understanding what that means — and what distinguishes it from cheaper alternatives — is worth your time.
Three Levels of SIP Fabrication
| Package Type | What Arrives | Field Labor Required | Best For |
|---|---|---|---|
| Blank SIPs | Rectangular panels, uncut | Everything — all cutting done on site | Experienced SIP fabricators with complete drawings |
| Prefabricated SIPs | Panels cut to size; openings roughed in | Spline and plate installation, final fit and seal | Most standard builds |
| RTA Package (coordinated by DreamStart) | Panels cut, headers installed, beam pockets cut, plates included, all rough openings fully framed and sized | Panel assembly, connection, sealing | Owner-builders; maximum speed; minimum field skill required |
The RTA advantage isn't just speed — it's quality consistency. Factory precision CNC cutting produces openings to ±⅛ inch tolerance. Field cutting on a busy jobsite, under time pressure, with rotating crew members, rarely achieves that.
What's in a DreamStart Homestead Shell Package
- Solid-Core EPS SIP wall panels — 6.5" nominal thickness (R-26+ whole-wall performance), factory-cut to your floor plan
- SIP roof panels — 8.25" to 12.25" thickness depending on span and climate zone (R-40+ performance)
- Internal lumber splines, headers, and beam pockets — factory installed
- Base and top plates — included and pre-sized
- SIP screws and fasteners — included per manufacturer specification
- Panel sealant, expanding foam, and SIP tape for air sealing all joints
- Shop drawings showing every panel's ID number, position, and connection details (engineering stamps coordinated only when your county or lender requires them)
- Factory-cut electrical chases at standard outlet and switch heights (14" and 48" from floor), 4' on center
- All rough openings sized per your window and door schedule
- EPS Authorized Dealer documentation for permitting
Panel Specs You Should Know
| Panel Type | Nominal Thickness | R-Value (nominal) | Typical Use | Max Panel Size |
|---|---|---|---|---|
| Wall SIP | 6.5" | R-23 nominal / R-26+ whole-wall | Exterior walls | 8' × 24' |
| Roof SIP (upgrade) | 8.25" | R-29 nominal | Short spans, low-pitch roofs | 8' × 24' |
| Roof SIP (heavy) | 10.25" – 12.25" | R-38 to R-49 nominal | Long spans, high-performance roofs | 4' × 24' |
| SIP with I-joist spline | Variable | Per panel spec | Spans up to 24' without intermediate support | 4' × 24' |
Electrical Chases — What's Pre-Cut and What Isn't
This is the item owner-builders most often misunderstand. Here's exactly what comes factory-cut in your panels and what requires field work:
- Horizontal chase at 14" from panel bottom — outlet height
- Horizontal chase at 48" from panel bottom — switch height
- Vertical chase approximately every 4 feet on center
- 1.25\" diameter chase — adequate for standard 14/2 and 12/2 wire runs
- Sill plates and top plates must be drilled to connect to chase locations — done during panel installation
- Electrical box openings cut with 4" hole saw at chase intersections during rough-in
- Additional chases requested before fabrication (no field cutting of SIP faces without manufacturer approval)
- Interior wall wiring — conventional stick-framed interior walls have no chases; run conduit or open-frame typically
The Shop Drawing Process
What to expect, what to review, and why this stage deserves your full attention.
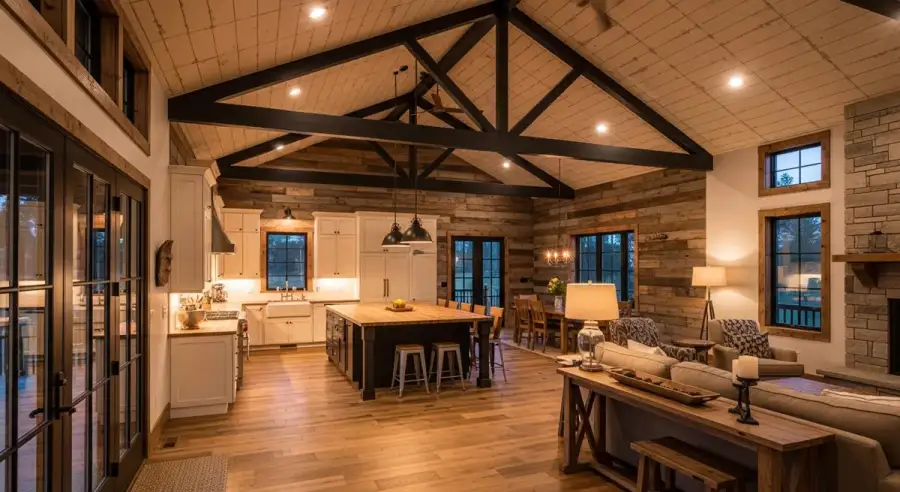
Shop drawings are the SIP manufacturer's detailed fabrication plan for your specific building. They're different from your architectural drawings — they show panel IDs, sizes, layouts, spline locations, opening dimensions, electrical chase positions, and connection details for every single panel in your structure.
The shop drawing stage is where precision happens. It's also where most project delays originate — not because the process is hard, but because owners don't engage with it quickly enough.
The Shop Drawing Timeline
| Step | Who Acts | Typical Duration |
|---|---|---|
| Architectural drawings submitted to DreamStart | Owner | Day 1 |
| DreamStart submits to EPS factory for shop drawing development | DreamStart | 1–3 business days |
| Factory creates SIP layout drawings (3D model + panel sheets) | EPS manufacturer | 1–3 weeks |
| Shop drawings sent to owner for review | EPS manufacturer → Owner | — |
| Owner reviews, marks corrections ('red-lines'), approves or requests revision | Owner | Should be < 5 business days |
| Revisions incorporated (if any) | EPS manufacturer | 3–7 days |
| Final approval signed and returned | Owner | Same day as review |
| Production begins | EPS factory | Next business day after approval |
| Fabrication complete, delivery scheduled | EPS factory / DreamStart | 3–5 weeks after approval |
What to Review on Your Shop Drawings
When your shop drawings arrive, don't sign and return them the same day without careful review. The factory cuts your panels exactly per these drawings — a wrong dimension here means a field correction later. Check every single one of these items:
- Overall building dimensions — does the footprint match your architectural plan exactly?
- All rough opening dimensions — window and door openings must match your window/door schedule precisely (width and height)
- Rough opening placement — verify horizontal centerlines and sill heights match your interior layout intent
- Wall heights — confirm they match your desired interior ceiling heights (accounting for panel thickness and floor/ceiling assemblies)
- Roof pitch — verify slope matches what's shown on your architectural elevation drawings
- Panel thickness — confirm wall and roof panels are the specified thicknesses
- Ridge detail — the ridge joint is the most critical air sealing point in the structure; verify the detail matches the manufacturer's approved ridge sealing spec
- Electrical chase layout — do the standard chase locations work for your intended outlet and switch placement?
- Special conditions — beam pockets, point load locations, cantilevered roof sections, any non-standard configuration
What Happens if You Request Changes After Approval
Changes after shop drawing approval trigger a design revision process that can add 1–3 weeks and potential re-fabrication costs depending on what's changed and how far into production the factory is. This is the number one reason to take the review period seriously and not rush to sign off. One extra day of thorough review can save two weeks of delay.
Financing Your Build
Options that work for SIP construction — and the lender conversation you need to have early.
Financing a SIP owner-builder build has become significantly more straightforward in the last decade as barndominium and alternative construction financing has matured. That said, not all lenders understand SIP construction, and not all loan products work for an owner-builder. Here's the landscape.
Financing Options That Work
USDA Section 502 loans are specifically designed for rural residential construction. Zero down payment. Below-market interest rates. Most rural Missouri parcels qualify for USDA geographic eligibility. SIP construction is eligible — you'll need your engineered drawings (with stamps coordinated when your lender requires them) and EPS Authorized Dealer documentation. Income limits apply.
Best fit: Owner-builders in rural Missouri counties building primary residence. Strong for first-time rural builders.
A single loan that covers the construction phase (interest-only draws as work is completed) and converts to a permanent mortgage at completion. Avoids two closings. Requires lender approval of builder credentials — DreamStart's EPS Authorized Dealer status and engineering documentation typically satisfies this. Farm Credit Services and local community banks are most flexible for this product in rural Missouri.
Best fit: Buyers who want a single loan, can document construction milestones, and have adequate credit score (typically 680+).
VA construction-to-perm loans are available for eligible veterans. No down payment. No PMI. VA has specific inspection requirements during construction. Missouri has strong VA loan activity — especially in areas near Fort Leonard Wood and Kansas City. DreamStart's documentation package is designed to support VA construction loan applications.
Best fit: Eligible veterans building primary residence.
The most flexible option and increasingly common for owner-builders. Pay for each phase as you go — land, site prep, shell, then interior in stages. No lender requirements or draw inspections. No interest carrying costs. Many owner-builders build the shell on cash and finance the completed home once it meets conventional mortgage requirements for a finished residence.
Best fit: Buyers with capital to deploy without leverage, or who want maximum flexibility in construction timeline and sequencing.
What Lenders Will Ask For
Most construction lenders will require some combination of the following. DreamStart coordinates the construction documentation items:
- Engineered drawings — coordinated by DreamStart through your design deposit, with engineering stamps coordinated when your county or lender requires them
- Builder credentials — DreamStart provides EPS Authorized Dealer certification; the local builder provides their own credentials for the assembly labor
- Construction cost estimate with line-item breakdown
- Land ownership documentation (deed or purchase contract)
- Lot appraisal or as-complete appraisal
- Construction timeline (draw schedule)
- Owner's credit history and income documentation
Delivery Day
What arrives, how it arrives, and how to be ready for it.

Delivery day is exciting and — if you're not prepared — stressful. SIP panels arrive on flatbed trailers. They're large (up to 8' × 24'), heavier than they look (up to 800 lbs for the largest panels), and need to be staged quickly so the trucking company can release the trailer without excessive unloading charges.
Here's how to have a smooth delivery day.
Equipment Required
- All-terrain telehandler (SkyTrak, Lull, or equivalent) — not a standard forklift; the rough terrain capability is required
- Fork extensions — 6' to 8' extensions for the telehandler to safely handle 8'-wide panels (available at equipment rental)
- Come-along and 2" ratchet straps — for pulling panels together during installation
- Banding cutters and pry bars for opening the panel bundles on the trailer
Staging the Panels
Once panels are off the trailer, sort and stack them by panel ID number — matching your shop drawings. Move them as close to their final installation position as possible without blocking the work area. Important rules for stacking:
- Always store panels flat — never standing vertically unsupported (they can tip or bow)
- Use stickers (2×4 or 3" wide lumber) placed every 8 feet maximum under stacked panels to keep them off the ground
- Stickers must be vertically aligned when stacking multiple layers
- Cover panels with tarps if rain is expected — panels are rated for exterior exposure during construction, but prolonged soaking is not advisable
- Keep first-floor wall panels staged separately from roof panels and second-floor panels (if applicable) — install in order
Site Access Requirements for Delivery
- Driveway and access route must accommodate a semi-truck with 53' flatbed trailer
- Confirm clearance height under any power lines over the access route
- Turnaround space at the site — the semi needs to be able to exit without backing a long distance
- Confirmed, dry weather window — unloading in mud significantly complicates telehandler operation
Assembly Week
The 3–5 day reality of getting your shell standing.
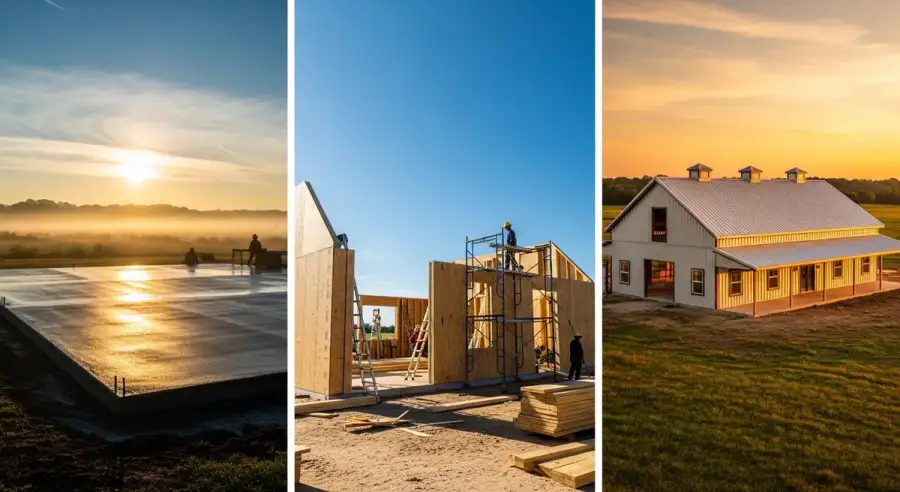
This is the week most people imagine when they think about building a house — and in SIP construction, it's legitimately impressive. A building goes from a concrete slab to a fully enclosed, weather-tight shell in 3–5 days. The local GC crew handles the panel installation — matched and coordinated by DreamStart before they ever show up on site. Your job this week is site support and staying out of the way.
The Daily Sequence
Sill plates installed and anchored with capillary break. First corner established — typically at a reference corner on your shop drawings. Wall panels set starting from the corner, sealant applied at each joint, panels fastened per spec. First two exterior walls are typically complete by end of day 1.
Remaining exterior wall panels installed. Window and door openings verified against shop drawings. Headers confirmed in place. By end of day 2 all exterior walls should be standing and fastened. Cap plates installed.
Roof panels assembled on the ground where possible — I-joist or lumber splines connected, 'chicken sticks' (temporary support members) installed to maintain panel shape during lifting. Roof panel installation begins. The ridge joint is executed with extreme attention to the manufacturer's sealing detail.
Remaining roof panels installed. Ridge sealed per spec. All roof panel joints taped and sealed. Eave details installed. By end of day 4 the building is fully enclosed.
Complete walkthrough of all joints — verify nailing/fastening is per spec, all sealant applied, all tape applied. Note any field modifications needed. Final walkthrough with local GC crew leader. Building is weather-tight and ready for mechanical rough-in.
Critical Installation Details
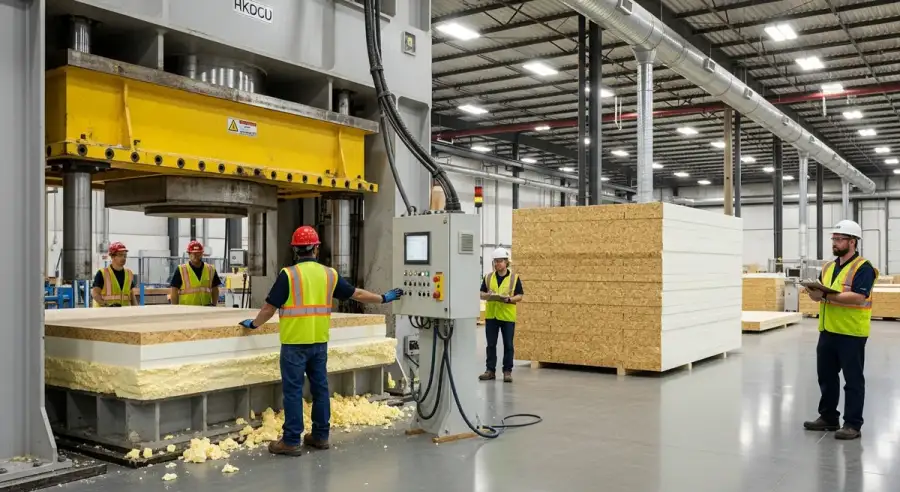
- Sealant applied at every SIP joint before panels are pushed together
- SIP tape applied over all exterior panel joints after installation
- Expanding foam (low-expansion, appropriate for SIP use) applied at all sill plates and around any penetrations
- In Missouri (Climate Zone 4/5), SIP tape is applied on the interior face at all joints
- Ridge joint: follow manufacturer detail exactly — this is not a place to improvise
- Brace SIPs during construction if work pauses — tall SIP walls need temporary bracing against wind before roof panels tie them together
Post-Assembly Checklist (Walk This Before Crew Leaves)
- All exterior joints sealed and taped
- Ridge joint fully sealed per spec
- All rough openings are correct size and positioned per shop drawings
- Sill plates fastened at specified interval
- Cap plates installed and connected at corners
- No damaged panel faces (if any damage occurred, document and report to DreamStart immediately)
- Shop drawings marked up with any field deviations (for your permanent record)
Mechanical Rough-In: HVAC, Electrical & Plumbing
SIP-specific requirements that your subs need to know before they start.
This is the chapter that separates people who have built with SIPs from people who haven't. SIP construction has specific requirements for all three mechanical systems that your electrician, HVAC contractor, and plumber need to understand before they touch your building. Most Missouri subs have never worked in a SIP building. That's fine — but brief them with this material first.
Electrical Rough-In
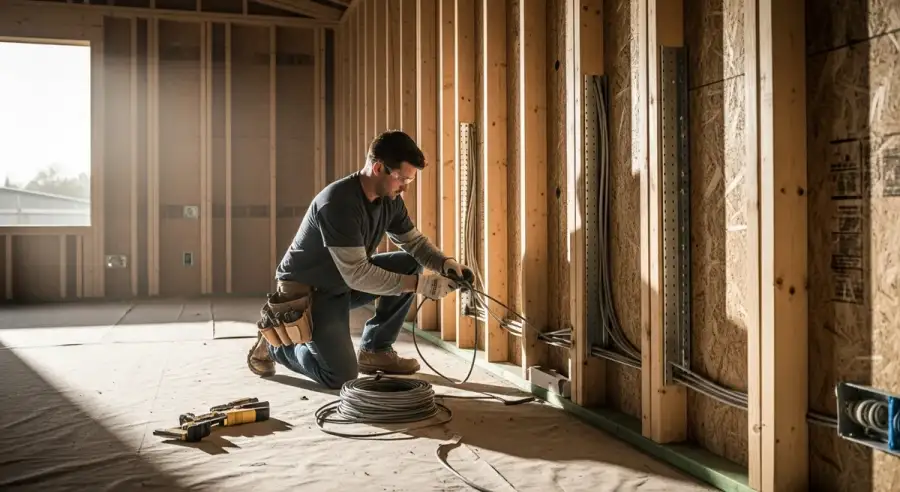
The good news: your factory-cut electrical chases are in the wall at exactly 14" (outlet height) and 48" (switch height), with vertical chases running every 4'. Running wire in SIP walls is actually faster than in stick-frame once you understand the system.
- Wire enters at the bottom of the wall through the drilled sill plate, or from above through the top plate
- Access holes for junction boxes: use a 4" hole saw at chase intersections; save the foam plug and reinstall with sealant/foam after wiring
- Sill plates and top plates must be drilled (1.5" bit) at every chase location to allow wire passage — do this during assembly, not after
- Additional horizontal chases requested before fabrication — cannot be field-added without manufacturer consultation
- Interior stick-framed walls: run conduit or use open-frame wiring techniques (no pre-cut chases in conventional framing)
- CRITICAL: Seal every electrical box penetration and chase opening with expanding foam after rough-in inspection — this preserves the building's airtightness
- Recessed can lights in SIP roof panels: NOT recommended. Use surface-mounted or pendant LED lighting instead. Recessed cans penetrate the envelope and cannot be properly sealed.
Plumbing Rough-In
This is the most critical mechanical trade to brief on SIP construction. The rule is simple but the consequences of ignoring it are significant: no plumbing in exterior SIP walls.
Plumbing supply lines must not run through exterior SIP walls. Placement of any pipe in the exterior SIP wall reduces the thermal insulation of the EPS core and in Missouri winters (Climate Zones 4–5), creates a real freeze risk. Supply lines in exterior walls can burst — and fixing a burst pipe inside a SIP panel is extremely disruptive and expensive. Design all plumbing supply runs to interior walls.
Plumbing Solutions for Tricky Situations
- Exterior hose bibs: use frost-free sillcocks — they don't hold water in the pipe through the wall, so freeze risk is eliminated
- Vent stacks: route vent pipes through interior walls to the roof. If a vent must go through an exterior SIP wall, consult DreamStart before cutting — manufacturer or engineer approval required
- Kitchen island sinks: use island vent / air admittance valve option — eliminates need for vent pipe through roof for the island fixture
- Plumbing against exterior wall: fur out the interior face of the SIP wall (add a 2×4 stud wall inside) to create a service cavity for pipes
- Minimize roof penetrations: consolidate vent stacks where possible; fewer roof penetrations = better air sealing = better performance
- Roof penetrations that are necessary: apply high-expanding foam around every vent pipe where it exits the SIP roof panel — include this in your plumber's scope of work
HVAC — The Most Important Sub Brief
This is where most SIP owners get overcharged and underperformed. Your HVAC contractor is almost certainly going to try to install a system that's too large for your building. This is not malice — it's habit. Old rules of thumb for sizing HVAC equipment (like "1 ton per 600 sq ft") were developed for leaky, poorly-insulated stick-frame houses. A Solid-Core SIP building is not that building.
- Require your HVAC contractor to perform an ACCA Manual J load calculation — not a rule-of-thumb estimate
- Provide your contractor with the building's actual R-values: R-26+ walls, R-40+ roof, window specifications
- SIP buildings are very airtight — mechanical ventilation (HRV or ERV) is required for indoor air quality and code compliance
- ERV (Energy Recovery Ventilator) is preferred in Missouri's climate — recovers both heat and humidity
- Mini-split heat pump systems are highly compatible with SIP construction and are increasingly cost-effective
- Ductwork should be run in conditioned space wherever possible — insulated attics are not needed in SIP roofs since the roof IS the insulation
- SIP roofs create a conditioned attic space by default — this is a feature, not an oversight; it means mechanical equipment in the attic doesn't suffer from extreme temperature swings
From Shell to Move-In
What happens after the assembly crew leaves — and how to sequence interior work.
Once your shell is standing and weather-tight, you have time. The shell protects your investment while you work through interior finish at whatever pace your budget allows. This is one of the genuine advantages of the owner-builder path — you don't have to finish everything before you move in if your county doesn't require it (and many don't).
Recommended Sequence for Interior Finish
- HVAC ductwork and mechanical equipment rough-in
- Electrical rough-in and panel installation
- Plumbing rough-in (supply, drain, vent)
- Inspection(s) — required if in a permit county
- Seal all chases and penetrations after inspection approval
- Interior walls insulated if desired (SIP exterior walls need no additional insulation)
- Vapor barrier on ceiling per climate zone requirements
- Drywall hung, taped, mudded, and sanded
- Drywall is your primary interior air barrier — tape and mud every joint carefully
- Exterior doors and windows installed (may have been done at shell completion for weather-tight status)
- Extension jambs on windows and doors — SIP walls are slightly thicker than conventional; jambs must be ordered to match actual wall thickness
- Interior trim, casing, baseboards
- Concrete slab prep or subfloor over sleepers if doing wood floors
- Paint interior walls
- Kitchen and bath cabinets installed
- Countertops
- Electrical fixtures and switches
- Plumbing fixtures, toilets, water heater
- HVAC equipment start-up and commissioning
- Final inspections (if permit county)
- Certificate of Occupancy (if applicable)
Windows and Doors in SIP Walls — A Note on Extension Jambs
SIP walls are slightly thicker than conventionally framed walls — a 6.5" SIP wall is about 7/16" thicker than a standard 2×6 wall because of the second OSB facer. Window and door manufacturers can accommodate this, but you must specify the correct wall thickness when ordering. Most manufacturers offer extension jambs in custom depths. Confirm your actual SIP wall thickness with DreamStart before ordering windows and doors.
Hiring Subcontractors in Rural Missouri
Start your sub search early — 6–8 weeks before projected shell completion is not too soon. In rural Northwest Missouri, licensed electricians and plumbers are not always immediately available. Tips:
- Get referrals from local lumber yards — they know who's active and who's reliable
- Be upfront about SIP construction when calling subs — some will say no; others are curious and willing to learn
- Share this guide's mechanical sections with any sub who hasn't worked in SIP construction before
- Get bids from at least 2–3 contractors for each trade
- Ask specifically about their experience with tight building envelopes and mechanical ventilation
- Electrical: find a licensed master electrician; wiring runs through factory-installed chases, which most electricians adapt to quickly
Missouri Resources & Contacts
The phone numbers, websites, and organizations you'll actually use.
DreamStart Building Company
Based in St. Joseph, MO. EPS Authorized Dealer. SIP panels factory-cut in Graettinger, Iowa.
Phone: (816) 388-0462
Email: dreamstartbuilding@gmail.com
Calculator: dreamstartbuilding.com/homestead-shell-calculator
Missouri Permitting & Regulatory
- Missouri Building Codes — no statewide residential code; contact county P&Z or assessor directly
- Missouri DNR Well Construction Permits: mdnr.mo.gov | (573) 751-4817
- Missouri DNR Onsite Wastewater (Septic): mdnr.mo.gov | permits issued through county health departments
- FEMA Flood Map Service Center (check your parcel): msc.fema.gov
- Missouri Department of Revenue — property tax and owner-builder exemptions
Financing Resources
- USDA Rural Development Missouri: rd.usda.gov/mo | 1-800-670-6553 — check rural eligibility map before applying
- Farm Credit Mid-America (covers most of Missouri): farmcreditma.com | multiple Missouri offices
- Missouri Agriculture Mediation Program (if farm property involved): mamp.org
- Missouri Housing Development Commission (MHDC): mhdc.com — first-time buyer programs
- DreamStart Financing Guide: dreamstartbuilding.com/barndominium-financing
Technical Standards & References
- SIPA (Structural Insulated Panel Association): sips.org — free download of SIP Best Practices, Builder and Designer guides
- SIPA Master Code Report ESR-4689 — the primary code evaluation report for SIPs used by plan reviewers
- ACCA Manual J — the HVAC load calculation standard; require your HVAC contractor to use it
- DOE Building America Best Practices (SIP edition): energy.gov/eere/buildings — free reference for mechanical system design in tight buildings
- APA – The Engineered Wood Association: apawood.org — SIP product guide and ANSI/APA PRS 610.1 standard
More DreamStart Guides
Ready to Start Your Missouri Homestead Shell?
Use our calculator to get a square-foot estimate for your build, or call us directly to talk through your site, your plan, and what it actually costs to get a shell in the ground in Missouri.
Or email us at dreamstartbuilding@gmail.com
Related Reading
Can I Legally Build My Own House in Missouri?
Owner-builder rights, contractor licensing, and DIY construction limits in Missouri.
Legal & ZoningBest Missouri Counties for Owner-Builders
Which Missouri counties have the most favorable rules for owner-builder construction.
Legal & ZoningDo You Need a Permit for a Barndominium in Missouri?
County-by-county permit requirements for rural Missouri construction.